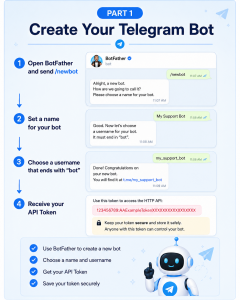
In the previous section, you created your Telegram Bot and obtained its API Token. While your bot is now active, it still has limited capabilities.
By default, Telegram bots have restricted access to groups and channels. They also lack administrator privileges, which means they cannot manage messages, moderate communities, or publish announcements until the appropriate permissions are granted.
This section explains how to configure your bot properly before putting it into production.
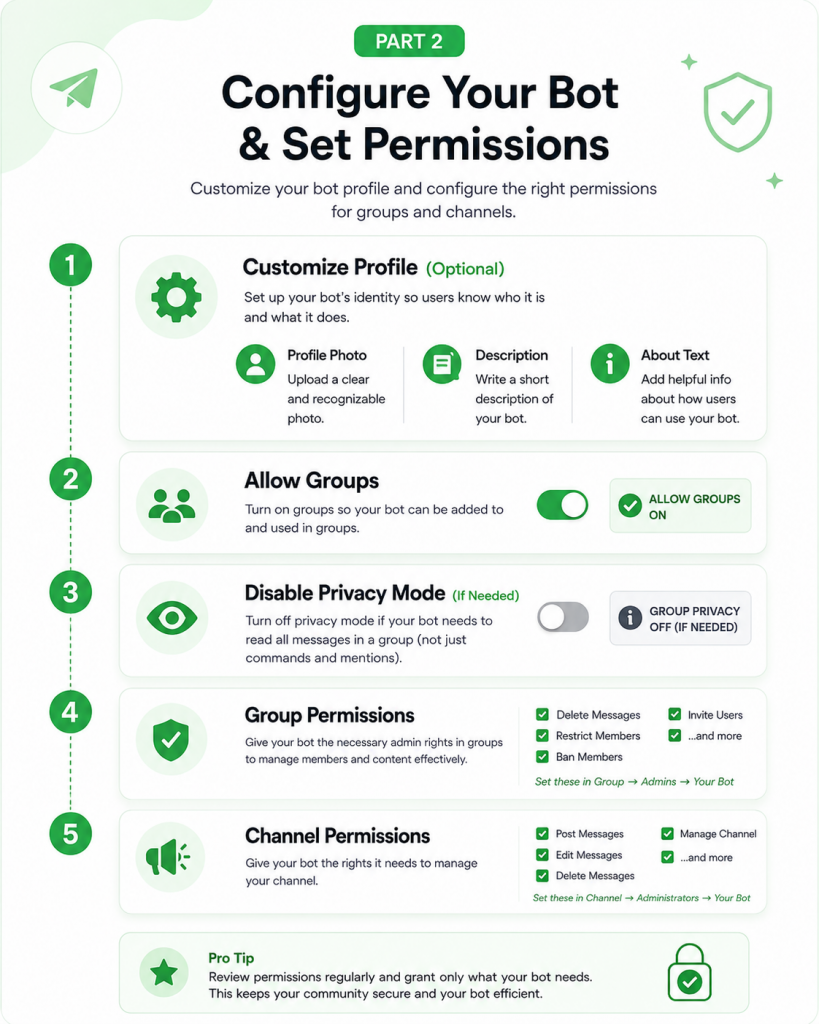
Step 1: Customize Your Bot Profile (Optional)
Although this step isn’t required for functionality, spending a few minutes polishing your bot’s profile makes it look more trustworthy and professional.
A complete profile helps users recognize your bot and understand its purpose before they interact with it.
BotFather provides several commands for customization.
| Command | Purpose |
|---|---|
/setdescription | Sets the full description shown on the bot’s profile. |
/setabouttext | Sets a short introduction displayed above the Start button. |
/setuserpic | Uploads a profile picture for the bot. |
Add a Description
Use the following command:
/setdescription
After selecting your bot, BotFather asks you to enter a description.
A good description briefly explains what the bot does.
Examples:
Customer support bot for answering product questions and service requests.
Receive notifications, track orders, and access helpful resources directly from Telegram.
Try to keep the description concise while clearly explaining the bot’s primary function.
Set an About Text
The About section is shorter than the full description and appears in several places inside Telegram.
Use:
/setabouttext
Examples:
- Official Support Bot
- Community Assistant
- Order Tracking Service
- Project Notification Bot
This short introduction helps users quickly identify the bot.
Upload a Profile Picture
A recognizable profile photo makes your bot look much more credible.
Use:
/setuserpic
Choose a clear square image, preferably:
- Company logo
- Product icon
- Brand mascot
- Service illustration
Avoid uploading images with excessive text since profile photos are displayed at a small size.
Step 2: Allow the Bot to Join Groups
Many Telegram bots are designed to work inside groups.
Examples include:
- Moderation bots
- Welcome bots
- Poll bots
- Customer support bots
- AI assistants
- Community management bots
However, some bots may have group access disabled.
To enable it:
/mybots
↓
Select Your Bot
↓
Bot Settings
↓
Allow Groups
↓
Turn Groups On
Once enabled, users can invite your bot into Telegram groups.
Note
If your bot cannot be added to a group, this setting is usually the first thing to check.
Step 3: Understand Telegram Privacy Mode
One of the most confusing settings for new developers is Privacy Mode.
By default, every new Telegram bot starts with Privacy Mode enabled.
When Privacy Mode is active, the bot cannot read every message posted in a group.
Instead, it only receives:
- Messages beginning with a slash command
- Messages that mention the bot
- Replies sent directly to the bot
This behavior protects user privacy and reduces unnecessary traffic.
When Should You Disable Privacy Mode?
Whether you should disable Privacy Mode depends on your use case.
For example, disabling it is recommended if your bot needs to:
- Monitor conversations
- Moderate group discussions
- Detect spam
- Analyze chat activity
- Automatically respond to keywords
- Collect community statistics
On the other hand, if your bot only responds to commands such as /help or /start, Privacy Mode can remain enabled.
How to Disable Privacy Mode
Inside BotFather, navigate to:
/mybots
↓
Select Your Bot
↓
Bot Settings
↓
Group Privacy
↓
Turn Off
After disabling Privacy Mode, your bot can receive normal group messages (subject to its permissions).
Best Practice
Only disable Privacy Mode when your bot genuinely needs access to group conversations.
Step 4: Configure Group Administrator Permissions
Simply joining a group doesn’t automatically give a bot permission to perform administrative actions.
If your bot needs to manage the group, it must be promoted to an administrator.
Once added to the group:
- Open the group settings.
- Go to Administrators.
- Add your bot as an administrator.
- Select the permissions it requires.
The exact options may vary slightly as Telegram evolves, but the following permissions are commonly available.
| Permission | What It Allows | Recommendation |
|---|---|---|
| Delete Messages | Remove inappropriate or unwanted messages | Recommended |
| Restrict Members | Mute or restrict users | Recommended |
| Ban Members | Remove users from the group | Recommended |
| Invite Users | Generate invite links or invite members | Optional |
| Pin Messages | Highlight important announcements | Optional |
| Manage Topics | Create or manage discussion topics | Optional |
| Manage Voice Chats | Control voice or video chats | Optional |
| Change Group Info | Modify the group name, description, or photo | Optional |
| Add Administrators | Promote other administrators | Only if necessary |
Security Tip
Follow the principle of least privilege. Only grant permissions that your bot actually needs.
Step 5: Configure Channel Permissions
Telegram channels work differently from groups.
Members generally cannot post messages, while administrators control all published content.
If your bot is responsible for publishing announcements or managing channel content, it must be added as a channel administrator.
Open your channel settings and assign administrator rights to the bot.
Common permissions include:
| Permission | Purpose | Recommendation |
|---|---|---|
| Post Messages | Publish content to the channel | Required |
| Edit Messages | Modify previously published posts | Recommended |
| Delete Messages | Remove published content | Recommended |
| Pin Messages | Highlight important announcements | Recommended |
| Manage Channel | Access advanced channel settings | Recommended |
| Invite via Link | Generate invitation links | Optional |
| Add Administrators | Assign new administrators | Optional |
These permissions allow the bot to manage content while keeping administrative control under your supervision.
Choosing the Right Permissions
A common mistake is granting every available permission simply because it’s convenient.
In reality, fewer permissions usually mean better security.
For example:
Notification Bot
Needs:
- Post Messages
Does not need:
- Delete Members
- Manage Voice Chats
- Add Administrators
Community Moderation Bot
Needs:
- Delete Messages
- Restrict Members
- Ban Members
May not need:
- Change Group Information
- Promote Administrators
Customer Service Bot
Typically needs:
- Read Messages
- Reply to Messages
- Post Messages (if applicable)
Usually doesn’t require advanced administrative privileges.
Before assigning permissions, think carefully about what your bot is actually expected to do.
Common Permission Issues
If your bot isn’t behaving as expected, check the following:
- Is Allow Groups enabled in BotFather?
- Has the bot been added as an administrator?
- Does it have the necessary administrator permissions?
- Is Privacy Mode preventing it from seeing messages?
- Are you testing in the correct group or channel?
Most permission-related problems can be resolved by reviewing these settings.
What’s Next?
Your Telegram Bot is now fully configured:
- ✅ Profile completed
- ✅ Group access enabled
- ✅ Privacy Mode configured
- ✅ Group administrator permissions assigned
- ✅ Channel administrator permissions assigned
In Part 3, you’ll learn how to verify that your bot is working correctly, troubleshoot common issues, and review frequently asked questions before using it in production.